Step 4: Pay-Out - Transfering Funds to Seller
Transferring Funds to a Seller Bank Account
When you trigger a Pay-Out depends on how your marketplace is configured. At some point, however, your merchant will need access to their accumulated funds. To pay out those funds, several options are available, with the most common being a direct transfer to the merchant’s bank account.
You can set this up in two ways from your Lemonway environment:
1. Using the Lemonway API
Providing that the bank account is active, you can process money-outs.
The rules for processing Pay-Outs are defined by your platform. We recommend keeping funds in the payment account until the refund period is closed.
POST https://sandbox-api.lemonway.fr/mb/ENV-NAME/directkitrest/v2/moneyoutsProcessing times
All money-out requests are sent to the bank on each banking business day at 10:30 AM.
Funds are usually credited within 2 to 4 business days.
Important
A Pay-Out can only be canceled before it is sent to the bank. In the Dashboard, you can cancel a Pay-Out from the transaction details page. Once the Pay-Out has been sent to the bank, the cancel option is no longer available.
2. Using the Lemonway Dashboard
Before you start
Make sure:
- A bank account is already added to the wallet.
- The bank account is eligible for payouts, i.e., verified (for example, not blocked or pending unusable status).
- The wallet has sufficient available balance.
- You know your Dashboard password (required to confirm the request).
Steps
-
In the Dashboard, go to Wallets.
-
Open the target wallet.
-
Select the Bank accounts tab.
-
Click Wire transfer (request).
-
Complete the form:
- Bank account: choose the destination account.
- Amount: enter the amount to transfer (EUR).
- Comment (optional): appears on the bank statement.
- Confirm with your password: enter your Dashboard password.
-
Click Submit.
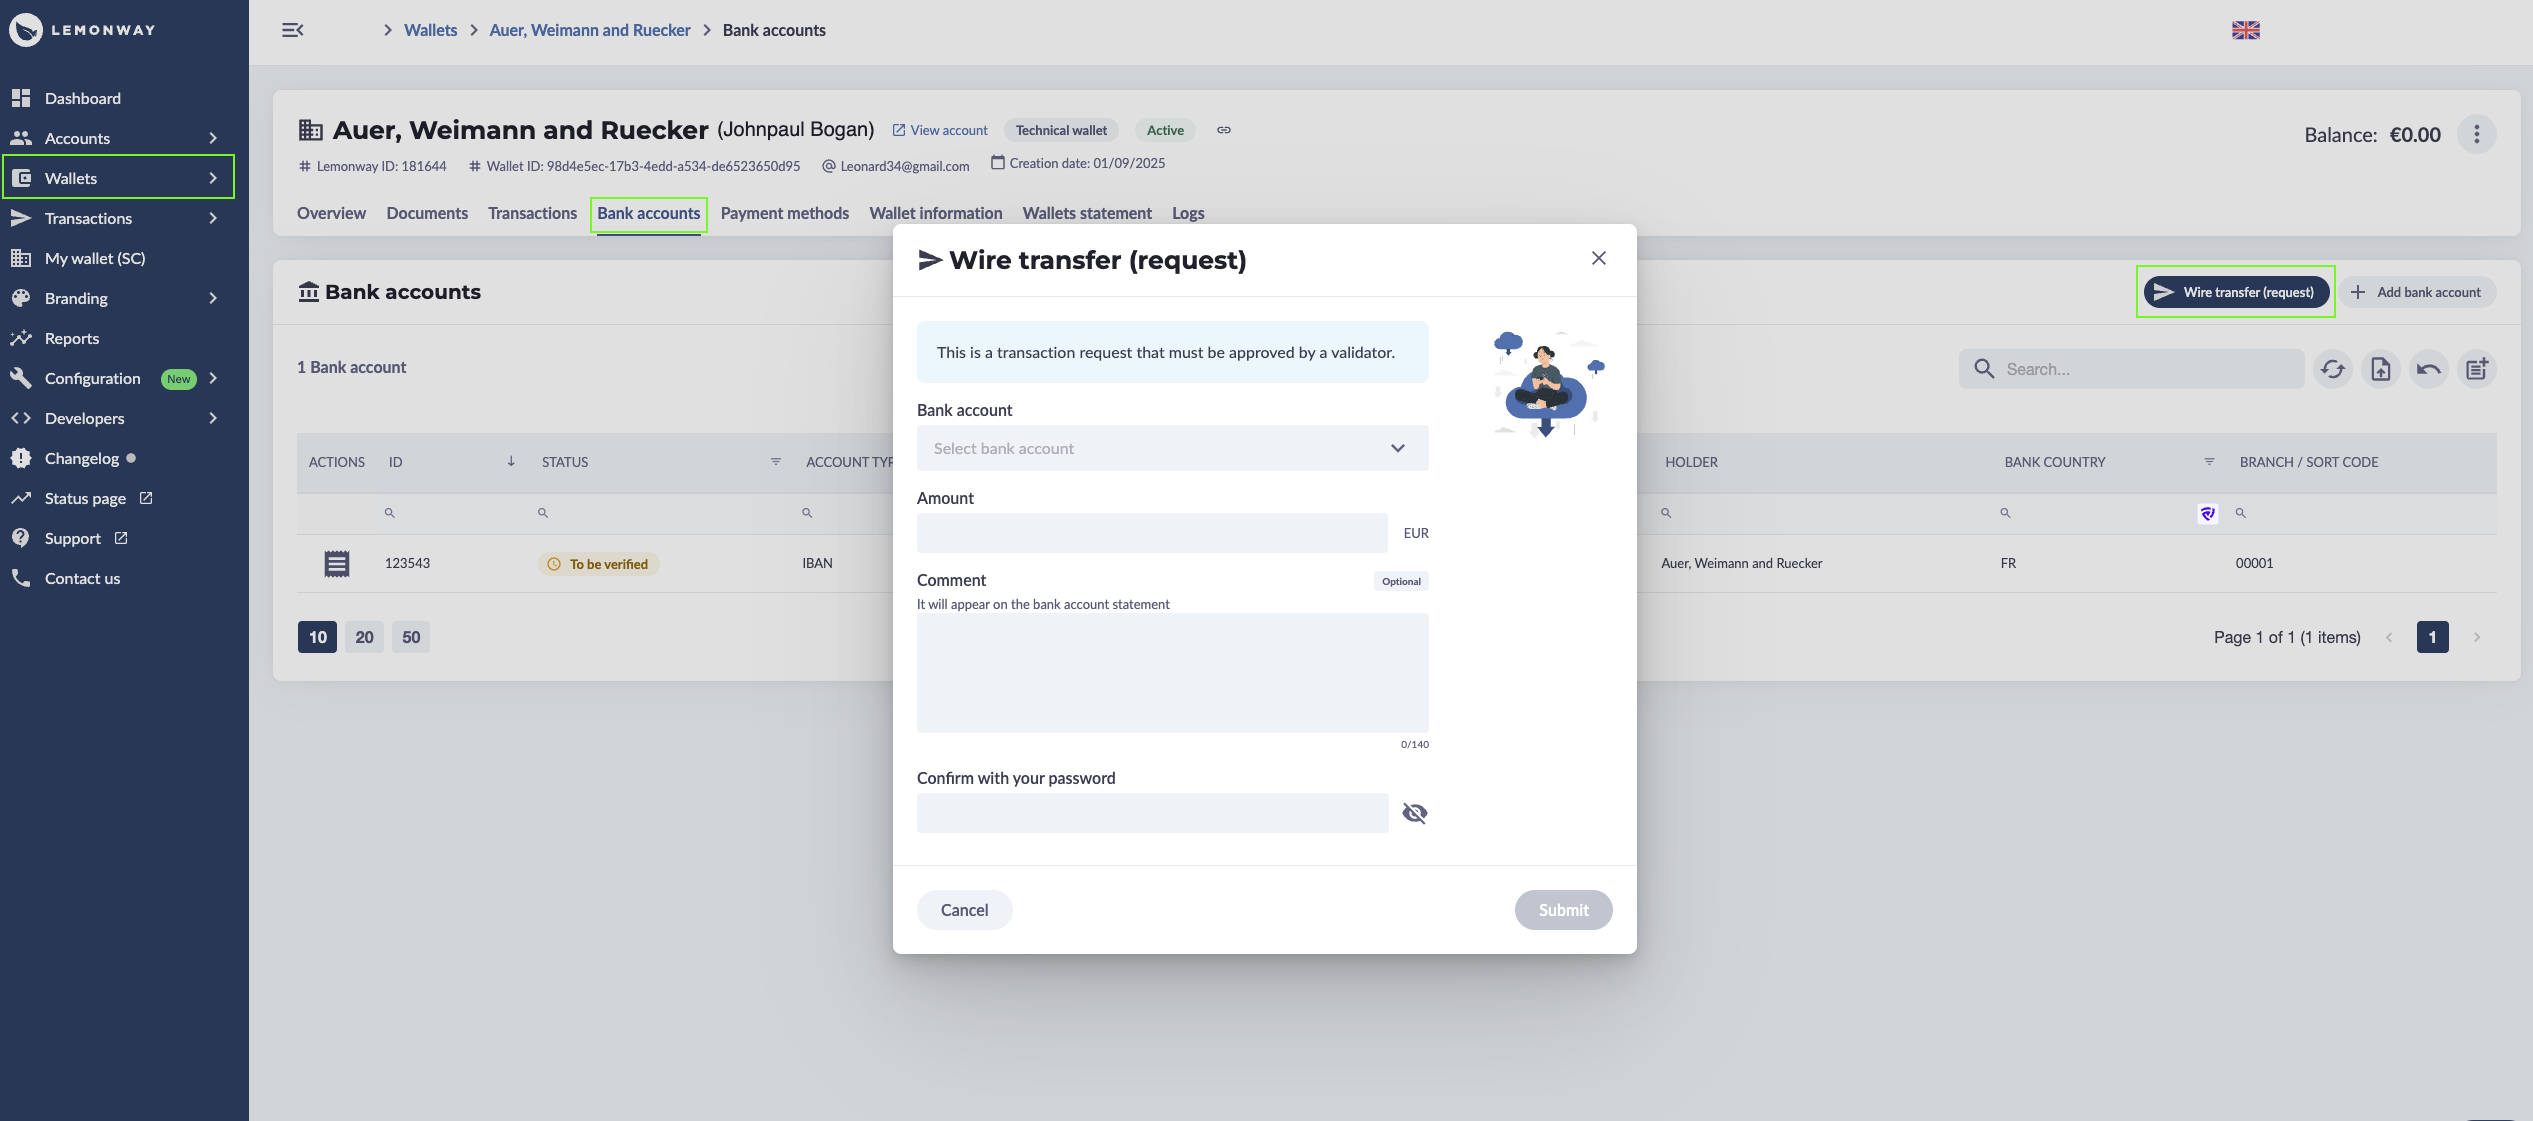
Wire transfer using the Lemonway Dashboard
What happens next
A wire transfer created from this screen is a request.
If your organization uses validation controls, the request must be approved by a validator before execution.
Typical lifecycle:
- Submitted
- Approved or Rejected
- Processed
Notes
- Submitting a request does not always mean immediate transfer execution.
- Processing time depends on internal validation and banking cut-off times.
- If the request is rejected, review the reason and resubmit if needed.
Updated 1 day ago