Step 1: Create a seller account
The Accounts Object
In a B2C seller onboarding flow, the Accounts Object is what you use to create and structure the seller payment account verification. The best way to think about the Account object is that it is used to create the seller record in your Lemonway environment, while the Onboarding object (Step 2) is used to verify that the people (representatives, shareholders), the legal entity, the business activity, and the financial situation are legitimate.
The seller account acts as a container in your Lemonway environment. You can use it to:
- create the legal-entity account record
- manage a company profile(s) and wallet(s)
- check account status and drive the next onboarding action
| Method | Endpoint | Purpose |
|---|---|---|
| POST | /accounts/legal-entity | Create a legal-entity account (company/organization). |
| GET | /accounts/{accountId} | Retrieve account details and current status for a specific legal entity. |
Create a seller account
When a seller signs-up on your platform, you can incorporate our POST /accounts/legal-entity endpoint to get them started right away, for example, when they click a Sign-up button. You just provide a minimum set of data to start the onboarding process.
NoteIf you already have some of the seller's details (name, email, contact info), you can pass them in at this stage. Lemonway will pre-fill those fields on the onboarding pages, so the seller doesn't have to enter them twice.
Create a legal entity endpoint
Use the the legal-entity endpoint on your platform to begin the account process:
POST https://onboarding-api.lemonway.com/accounts/legal-entityAccount Creation: Expected Payload
How account creation is incorporated into your platform is entirely up to you; required information may differ depending on the type of legal entity you create. In our example, we are creating a seller company account; therefore, specific data is required, such as tax codes, legal representatives, shareholding details, and financial status, to name a few.
You can find more about data requirements here
{
  "legalEntity": {
    "name": "Chloe Rossi Corp",
    "type": "COMPANY",
    "registrationNumber": "246810-357",
    "address": {
      "country": "FR"
    },
    "registrationDate": "2021-06-15"
  },
  "legalRepresentative": {
    "firstName": "Louis",
    "lastName": "Bianchi",
    "birthDate": "1991-11-03",
    "email": "[email protected]",
    "address": {
      "country": "PT"
    },
    "birthCountry": "FR",
    "nationalities": [
      "FR"
    ]
  },
  "profile": "SELLER",
  "walletId": "45548203W"
}
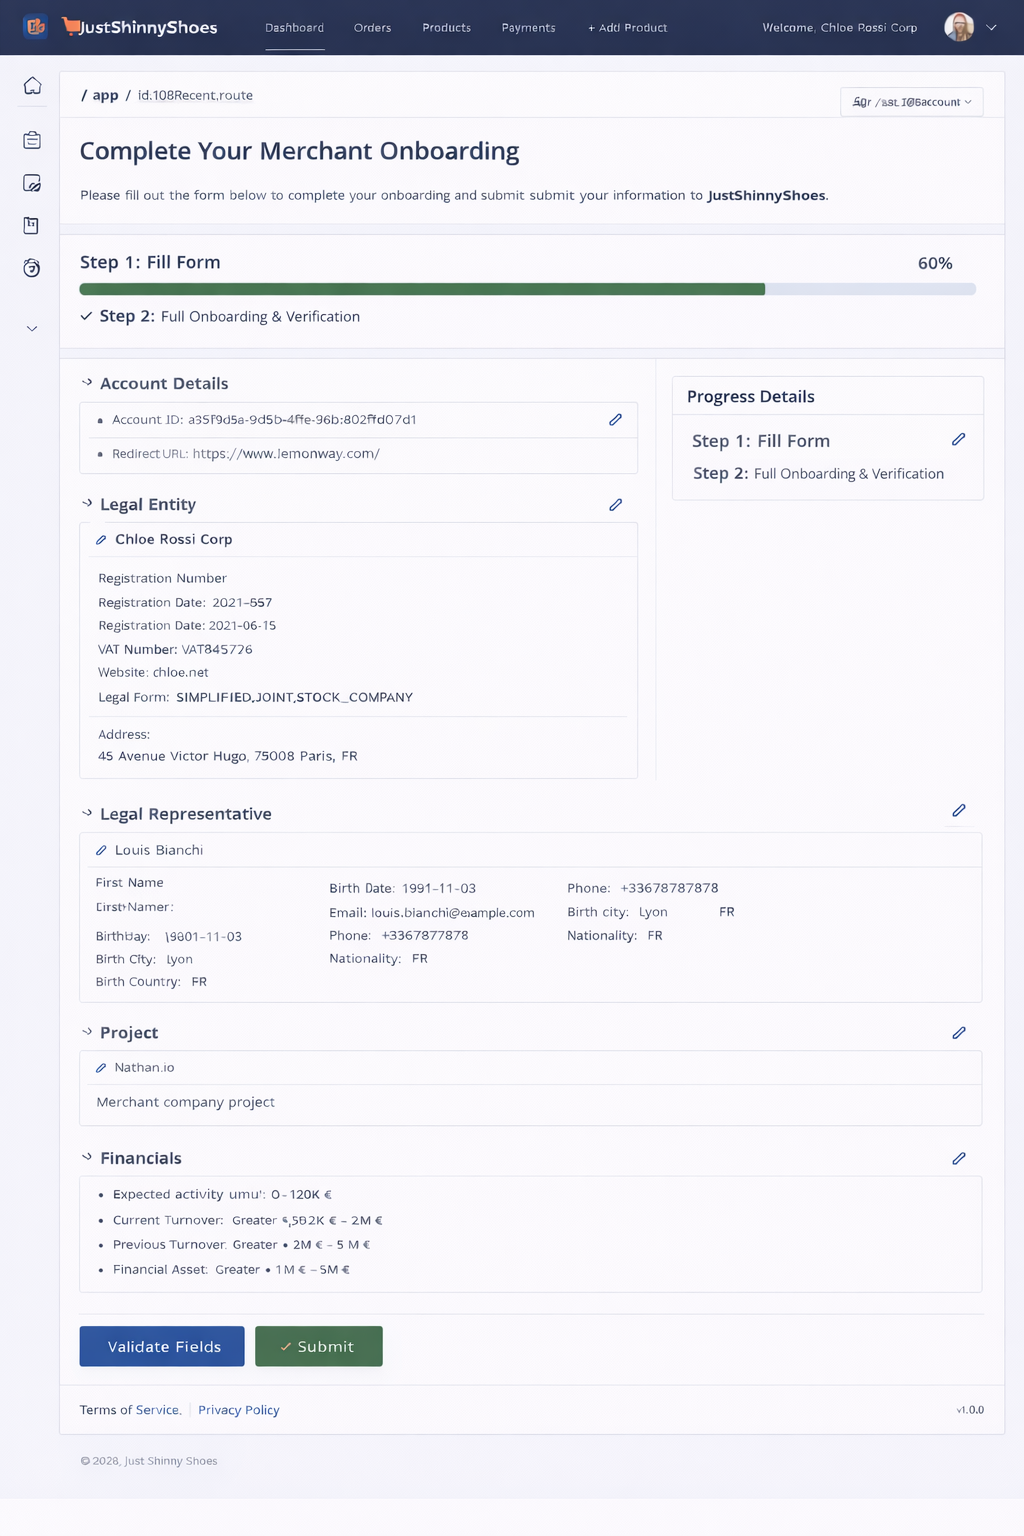
Conceptual View 1: The Seller's Journey
To help you understand how to integrate our endpoints, we’re providing a conceptual view of what the seller journey can look like, what the seller should expect, and how you can present this information on your platform. From the seller's perspective, it could look like the example below.
Hosted Online OnboardingIf you want to leave the heavy lifting to us check out our hosted Online Onboarding solution here
Account Creation: Success
If the account is created in your Lemonway environment you will recieve a 201 response:
{
  "id": "ff928147-d51e-4f22-b26c-d2c1a2sebd8d",
  "status": "CREATED",
  "profileStatus": "AWAITING_INFORMATION"
}
NoteIf required details are missing during account creation, the API may return one of the following 4XX status responses, while server-side issues may return a 500 Internal Server Error
Responses
-
201
Account created successfully
-
400
Missing or invalid request parameters
-
401
Missing or invalid authentication token
-
409
Account with similar details already exists
-
500
Unexpected error occurred on the server
You can find more information about account and profile statues here
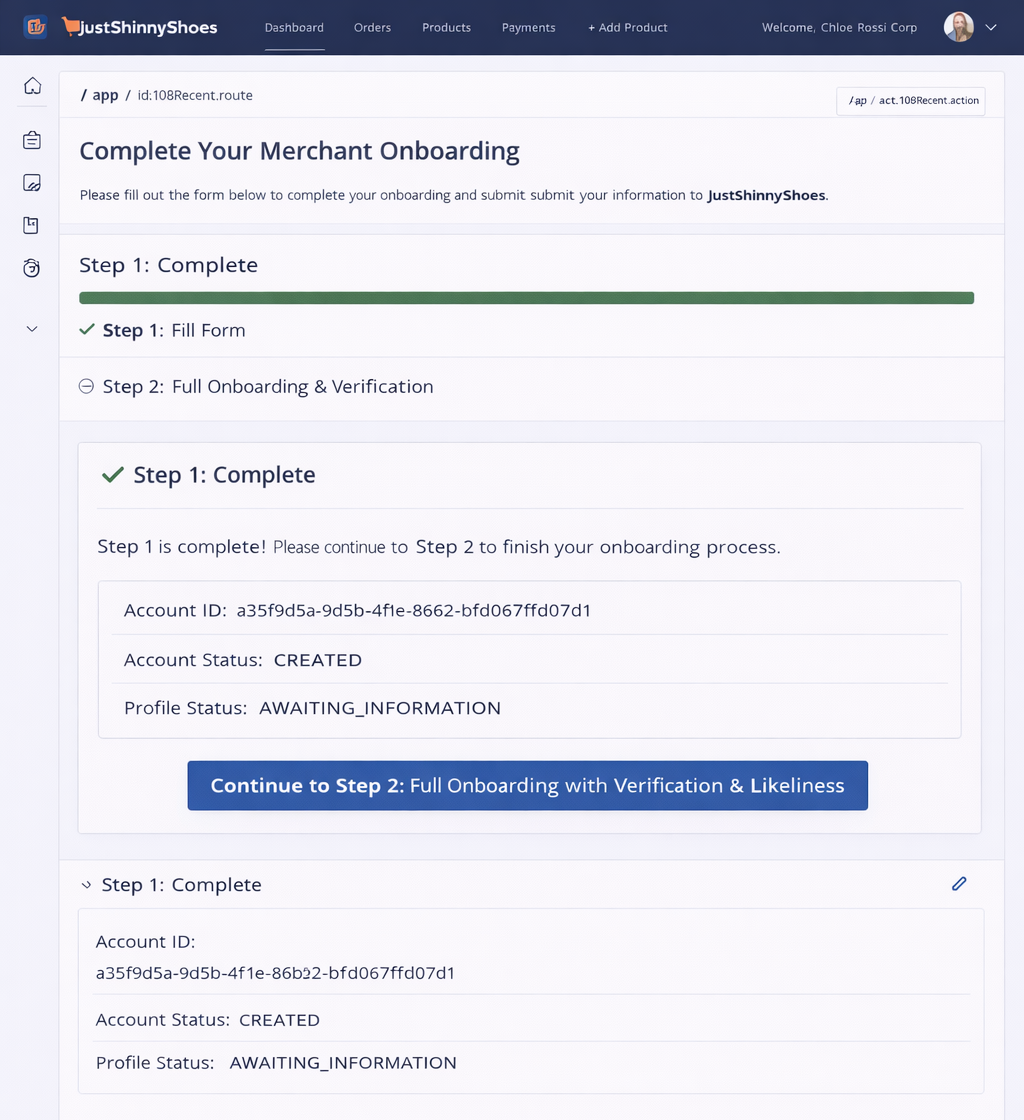
Conceptual View 2: The Seller's Journey - Account creation complete
From the seller's perspective, a successful account creation means Step 1 is complete, and Step 2 is the verification step they must complete before they can start selling on your platform.
Account Creation: using Lemonway Dashboard
Creating an account via the Lemonway Dashboard is straightforward and is the easiest way to get started in your environment. However, you should only use this method if you are creating a small number of accounts and have not yet industrialized the account creation process on your platform. You will require specific information for the Legal Entity or individuals for whom you are creating the account.
To create an account in the Lemonway Dashboard:
- Sign in to your account.
- Click Accounts.
- Click Accounts list (this will display all accounts in your environment).
- Click Create Account and select the account type you want to create from the list.
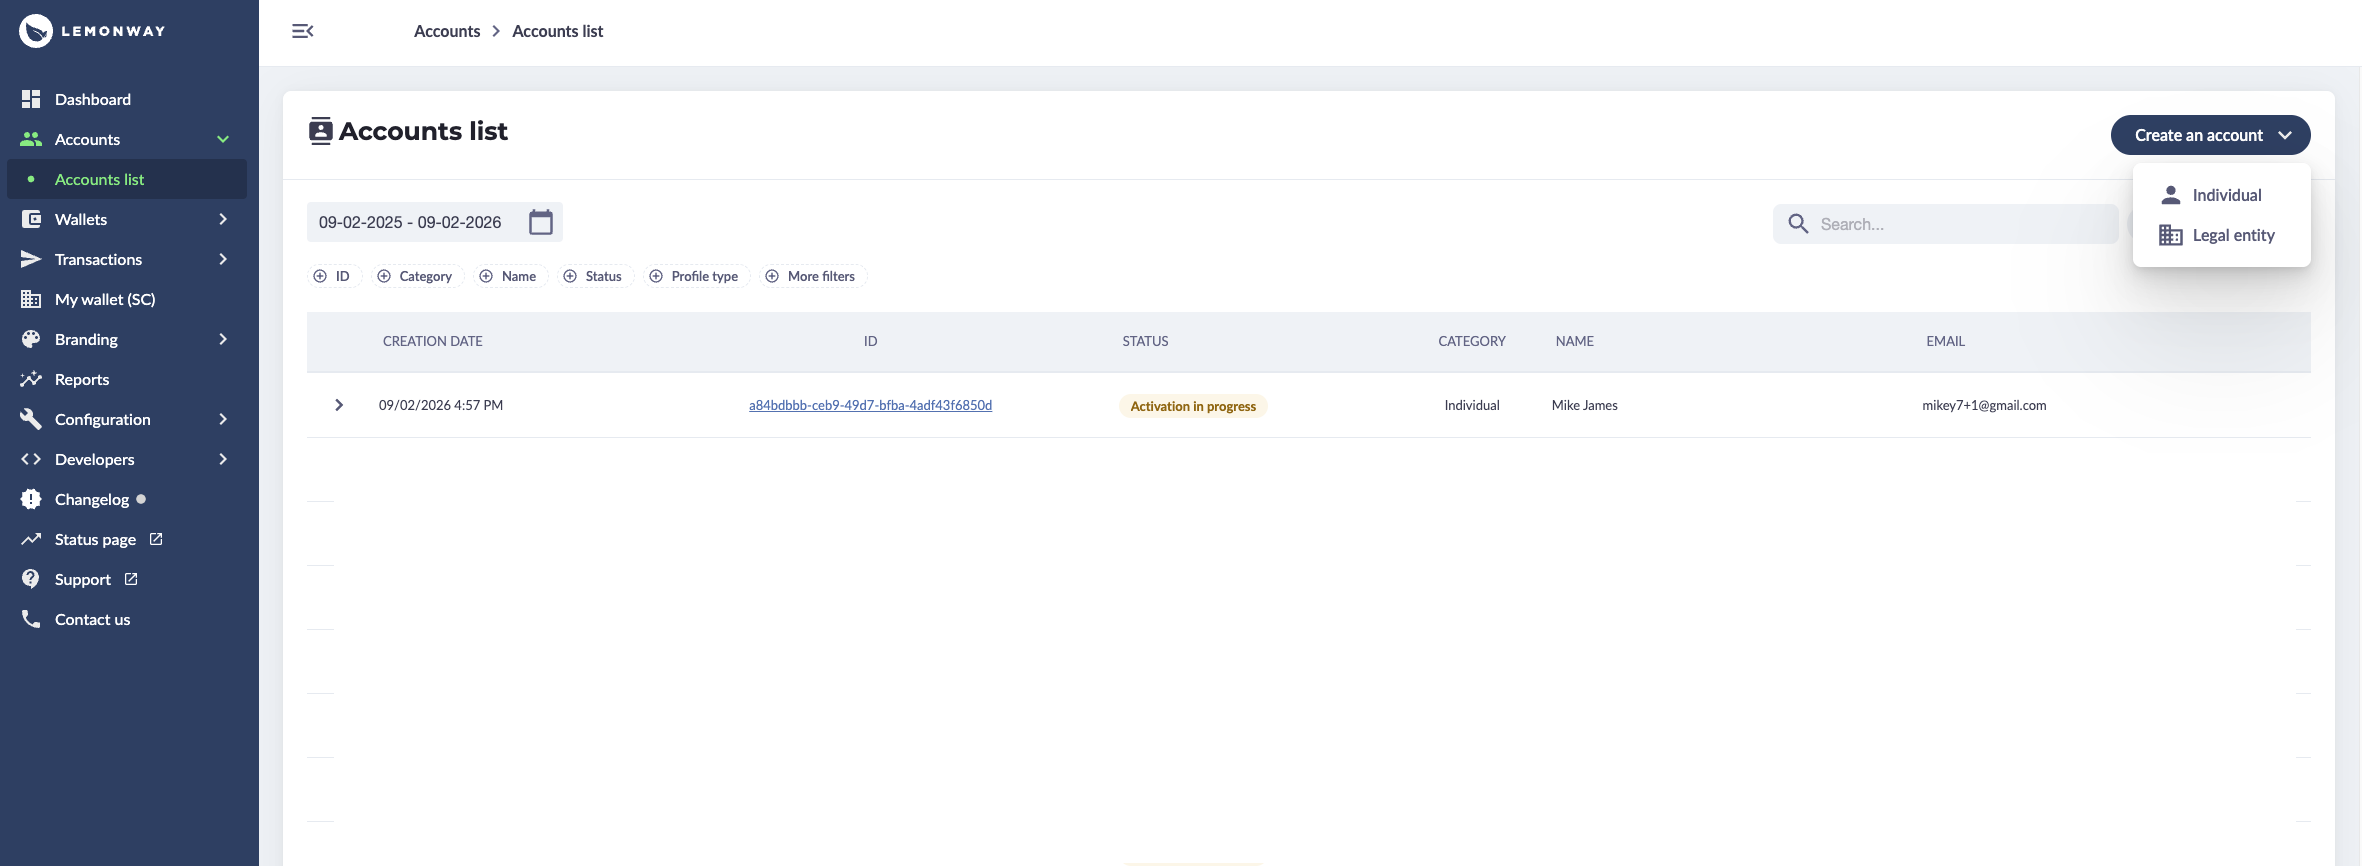
LemontipThe dashboard is useful if you want a global view of your account statuses. Simply click on an individual line in the table view to see detailed statuses and information.

Updated 1 day ago