Overview
This document explains two methods to connect Claude to Lemonway's MCP (Model Context Protocol) server. Select the method that matches your setup:
- 1. JSON Config File: For users running Claude Desktop locally.
- 2. Claude.ai (Paid Plan): For users on Claude Pro, Team, or Enterprise via the browser interface.
1. JSON Config File (Desktop)
This method involves editing Claude Desktop's configuration file to register an MCP server. Claude will automatically connect to it on startup.
1.1 Prerequisites
- Claude Desktop installed
- Node.js and npx installed
- A terminal/command prompt (ensure you have the correct permissions)
1.2. Config file location
| OS | Path |
|---|---|
| macOS | ~/Library/Application Support/Claude/claude_desktop_config.json |
| Windows | %APPDATA%\Claude\claude_desktop_config.json |
| Linux | ~/.config/Claude/claude_desktop_config.json |
1.3 Setup Steps
Step 1: Open the config file
- Navigate to the path above for your OS. If the file doesn't exist, create it.
Step 2: Add the MCP server entry
- Paste the following JSON into the file. If a config already exists, merge the
mcpServersblock into it.
{
  "mcpServers": {
    "lemonway": {
      "command": "npx",
      "args": [
        "mcp-remote",
        "https://documentation.lemonway.com/mcp"
      ]
    }
  }
}
NoteIf
npxis installed in a non-standard location (e.g. vianvm), replace"npx"with the full path — for example:/Users/yourname/.nvm/versions/node/v20.x.x/bin/npx
Step 3: Save the file
- Save the JSON file and make sure it is valid (no trailing commas, all brackets closed). You can validate it at jsonlint.com.
Step 4: Restart Claude Desktop
- Fully quit Claude Desktop (
Cmd+Qon Mac, or right-click the tray icon → Quit on Windows) and reopen it.
Step 5: Verify the connection
- Open a new chat in Claude Desktop. If the MCP server connected successfully, you will see it listed in the tools available to Claude.
2. Claude.ai (Paid Plan)
If you have a paid subscription, you can connect MCP servers directly from the Claude.ai web interface, no config file or terminal required.
2.1 Prerequisites
- An active Claude Pro, Team, or Enterprise subscription
- Access to claude.ai in your browser
2.2 Setup Steps
Step 1: Go to Settings
- Log in to claude.ai and click your profile icon in the top-right corner, then select Settings.
Step 2: Open the Integrations or MCP section
- In the Settings panel, look for Integrations, Connectors, or MCP Servers (the exact label may vary by plan).
Step 3: Add a new MCP server
- Click Add Server and fill in the following:
| Field | Value |
|---|---|
| Name | lemonway |
| Server URL | https://documentation.lemonway.com/mcp |
Step 4: Save and enable
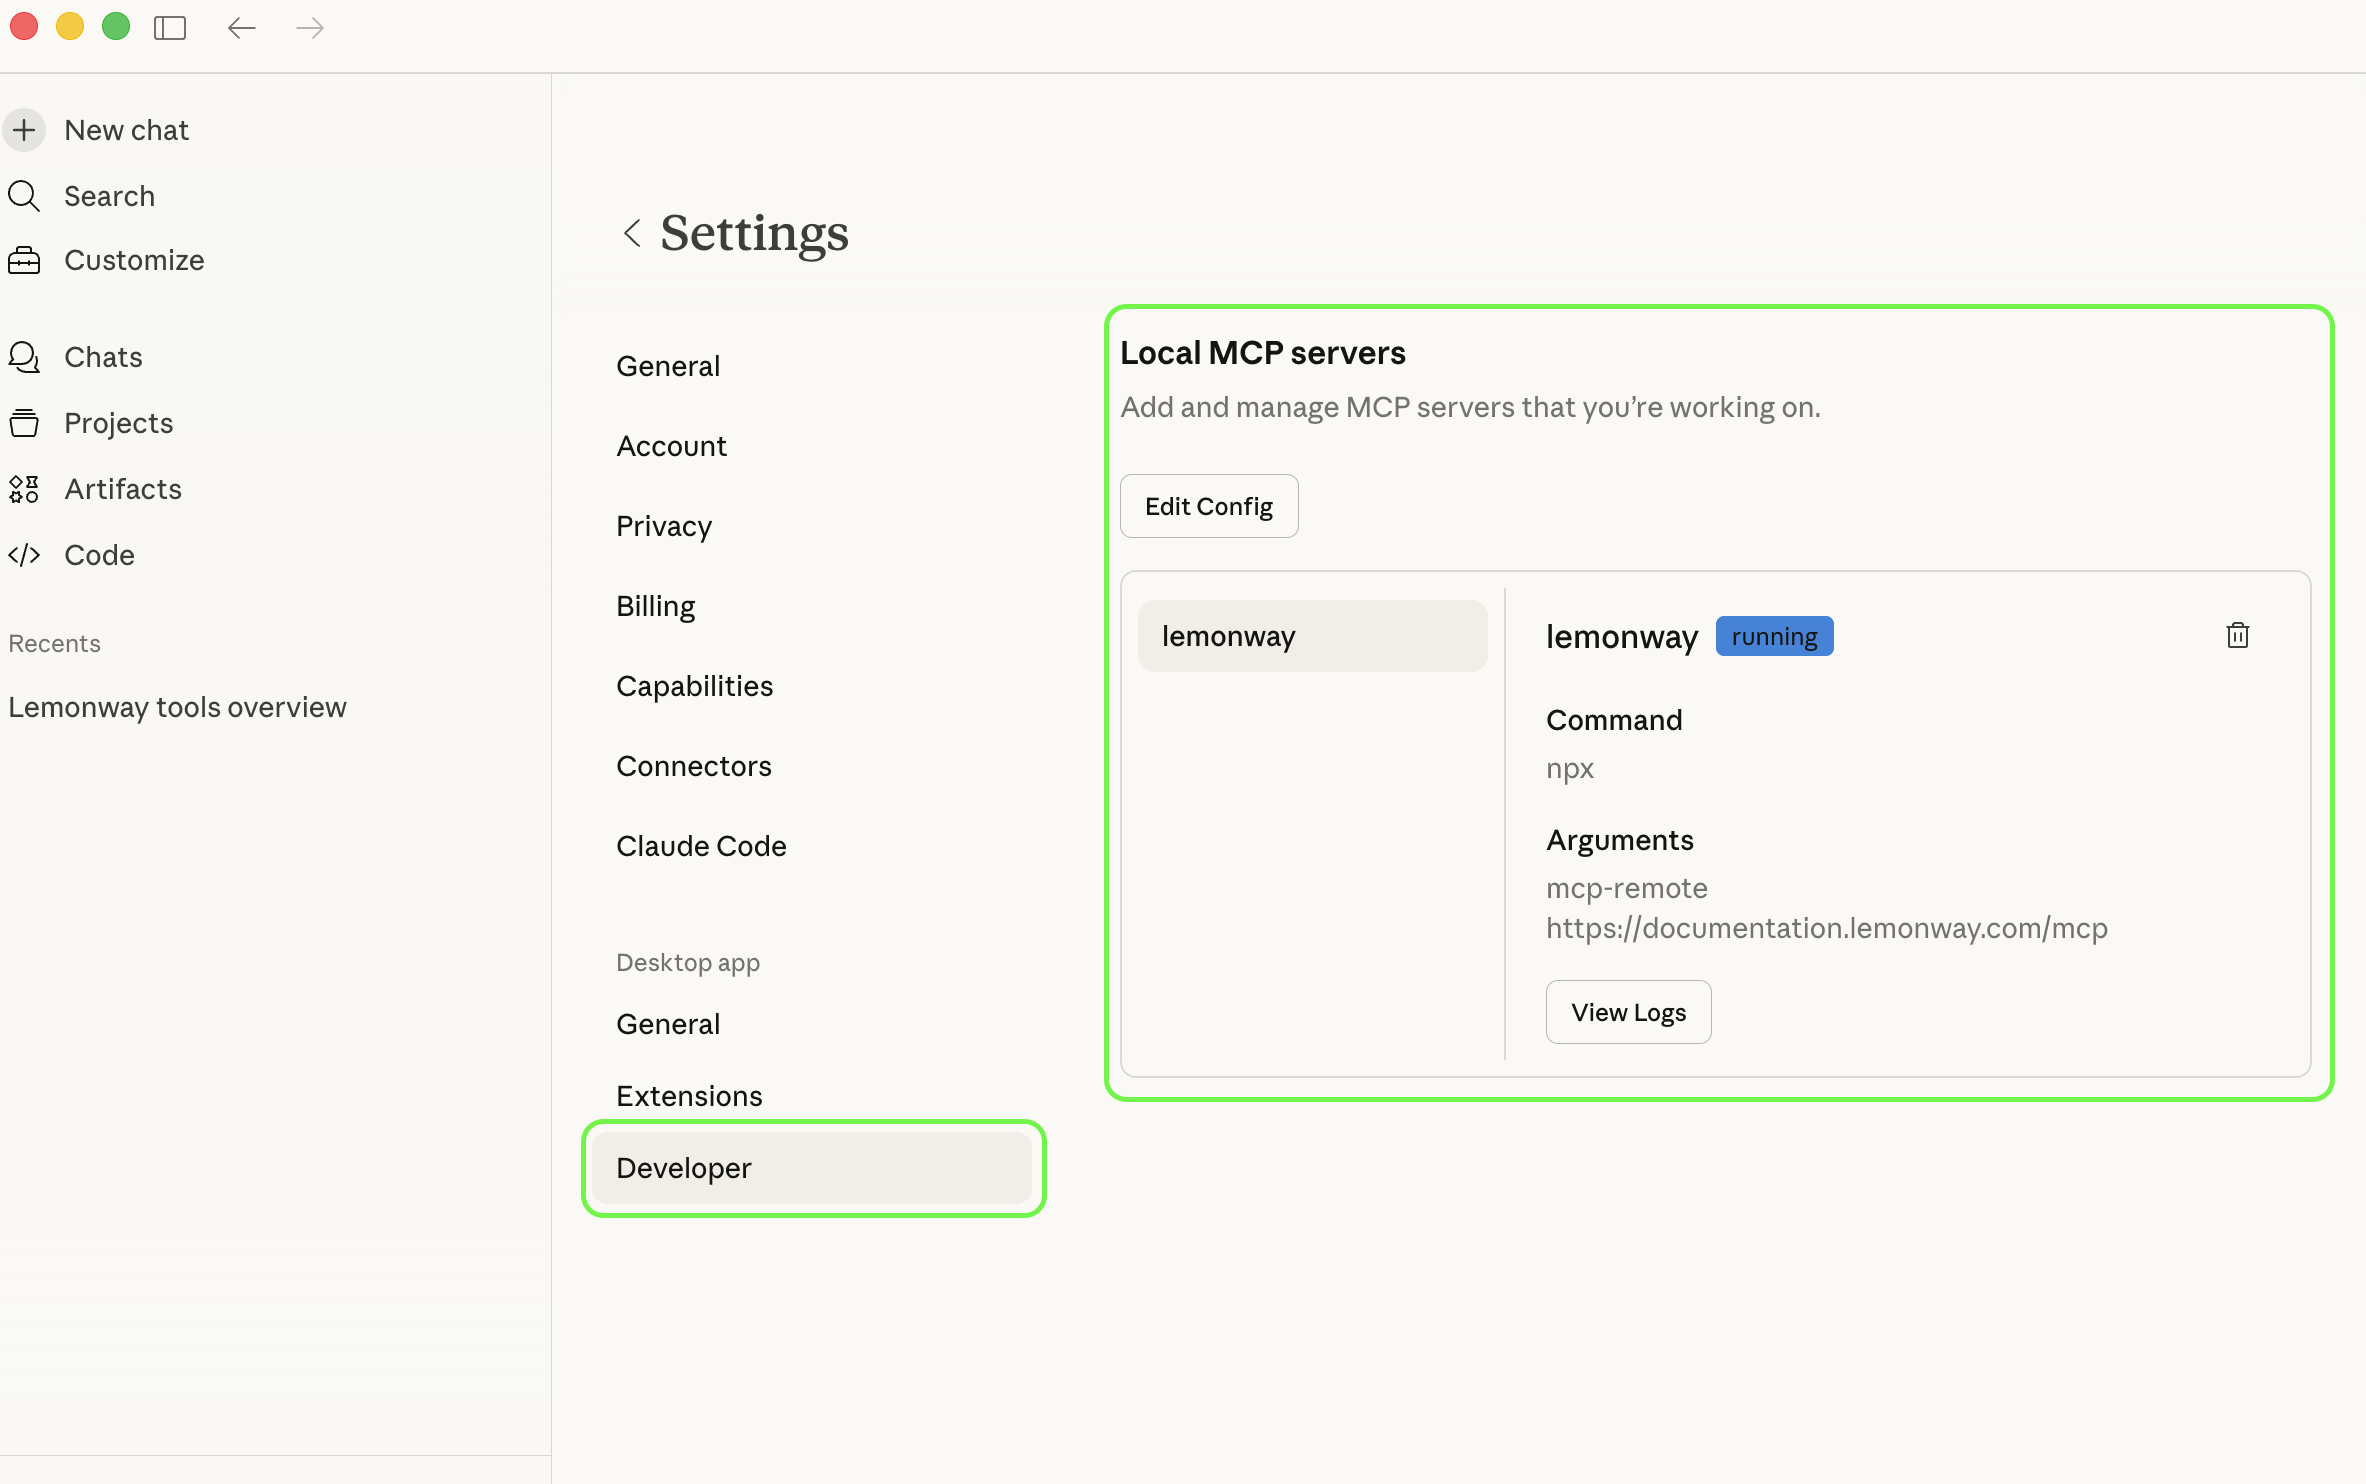
- Save the server entry and toggle it on. Claude will confirm the connection. You can also check the settings panel to see if the MCP is running.
Step 5: Start a conversation
-
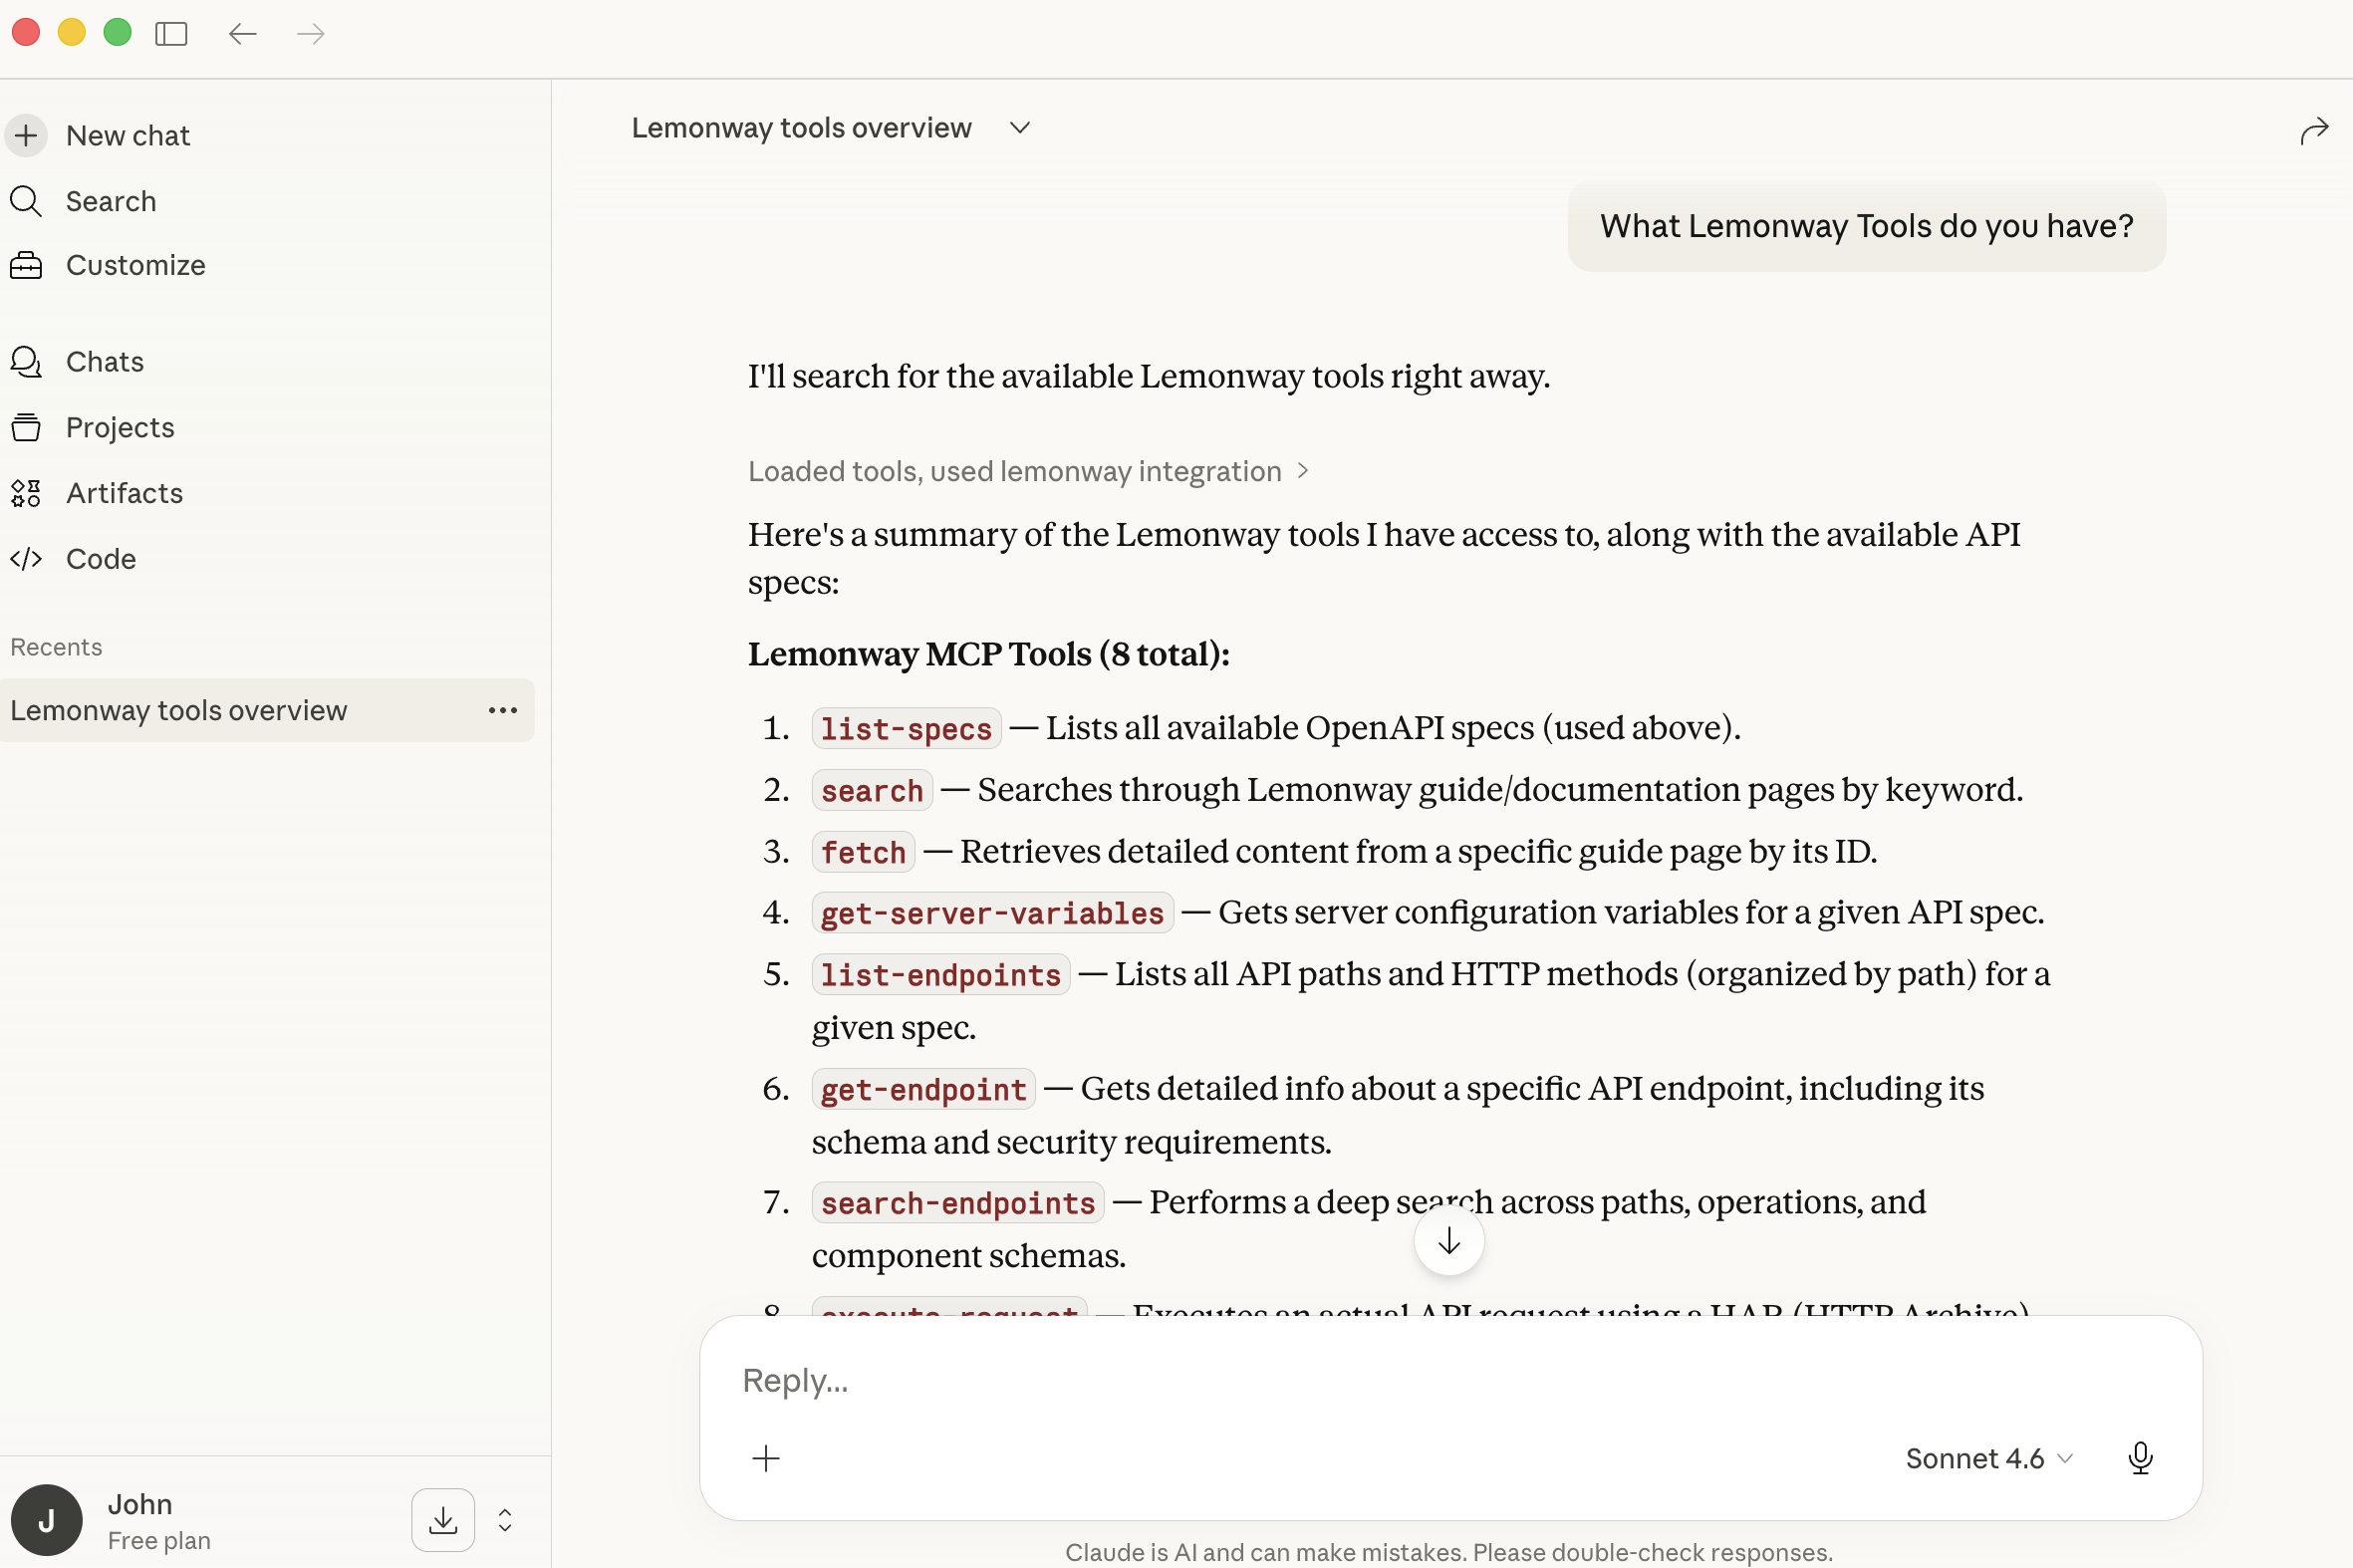
Open a new chat and ask Claude, "What Lemonway tools do you have?". Claude will list all the Lemonway MCP tools.
3. Troublingshooting
1. Failed to spawn process: No such file or directory
npxis not installed or not in the PATH used by Claude Desktop. Install Node.js from nodejs.org, then verify with:
which npx
npx --version
If you installed Node via nvm, use the full absolute path to npx in your config file instead of just "npx".
2. Server disconnects immediately after connecting
- The MCP server URL may be unreachable, or the command failed silently. Check your internet connection and confirm the server URL is correct. You can also check the MCP logs for error details.
3. Config file changes are not taking effect
- Always fully quit and reopen Claude Desktop after editing the config file. A simple window close may not restart the background process.
4.JSON syntax errors
- Validate your JSON at jsonlint.com before saving. Common mistakes include trailing commas and mismatched brackets.